Let's Make a Diaper Cake in 30 minutes (DIY Diaper Cake)

Fun, creative diaper cake tutorial by Mama Kat
When Phil Bae slept, Mama took out her tools and started playing! She loves making diaper cakes. It relaxes her and gives her an outlet for her creativity.
Materials for your DIY Diaper Cake!
Before you make a diaper cake, you will need to gather all your materials. You can complete the cake in 30 minutes or less once you have all your materials ready. For this tutorial, I've gathered the following materials:

Ribbons (Patterned satin pink damask, translucent or sheer, opaque, golden) You should have at least three types of ribbons ready for your cake, in different opacities, widths and patterns.
Mesh Tulle (pink and glittery)
Decorations (fluffy pink lace balls)

A pair of scissors
Some light colored rubber bands
A pot or deep pan

One or two packs of size-one diapers (if you're making a small two-tiered cake, you just need one pack of 35 size ones).

A roll of double-sided tape
Steps
Remove the diapers from the bag and lay them out on a clean surface. If you're using Pampers' diapers, don't forget to remove that rewards sticker from inside the pack!

Pampers Rewards sticker with a code that you can enter into pampers.com
Lay the diapers, one by one and over each other and all around the pot (with the designs facing in so that your cake is white on the outside), into the pot. Leave around half an inch of space from one diaper end to the next. Keep it consistent. Once the diapers surround the pot, you'll keep layering diapers on top of each other and filling in the inside of the circle.

We're making a diaper cake wheel. This is our base layer. If you want a bigger base layer, lay the diapers in a pot with a bigger circumference.

The center of the diaper cake can be an empty toilet paper roll or just a rolled up diaper.
Make sure the diaper cake is nice and compact and fills the entire pot. A loose base will fall apart. Lift the completed base up slightly and wrap the rubber band around it. Pull the rest of the cake up and maneuver the rubber band to the center of the cake.

A completed base of the cake.
Wrap the mesh tulle around the outside of the cake base to male the cake compact. This will make applying decorative ribbons easier. The tulle will hug the diaper cake nicely. You can keep it in place by using the double-sided tape (one side on the diaper and one side for the tulle.)

Mesh tulle wrapped around the diaper cake. I kept the rubber band in place.
Around the circumference of the cake (now wrapped in mesh tulle), I apply double-sided tape before I layer on the decorative ribbons.
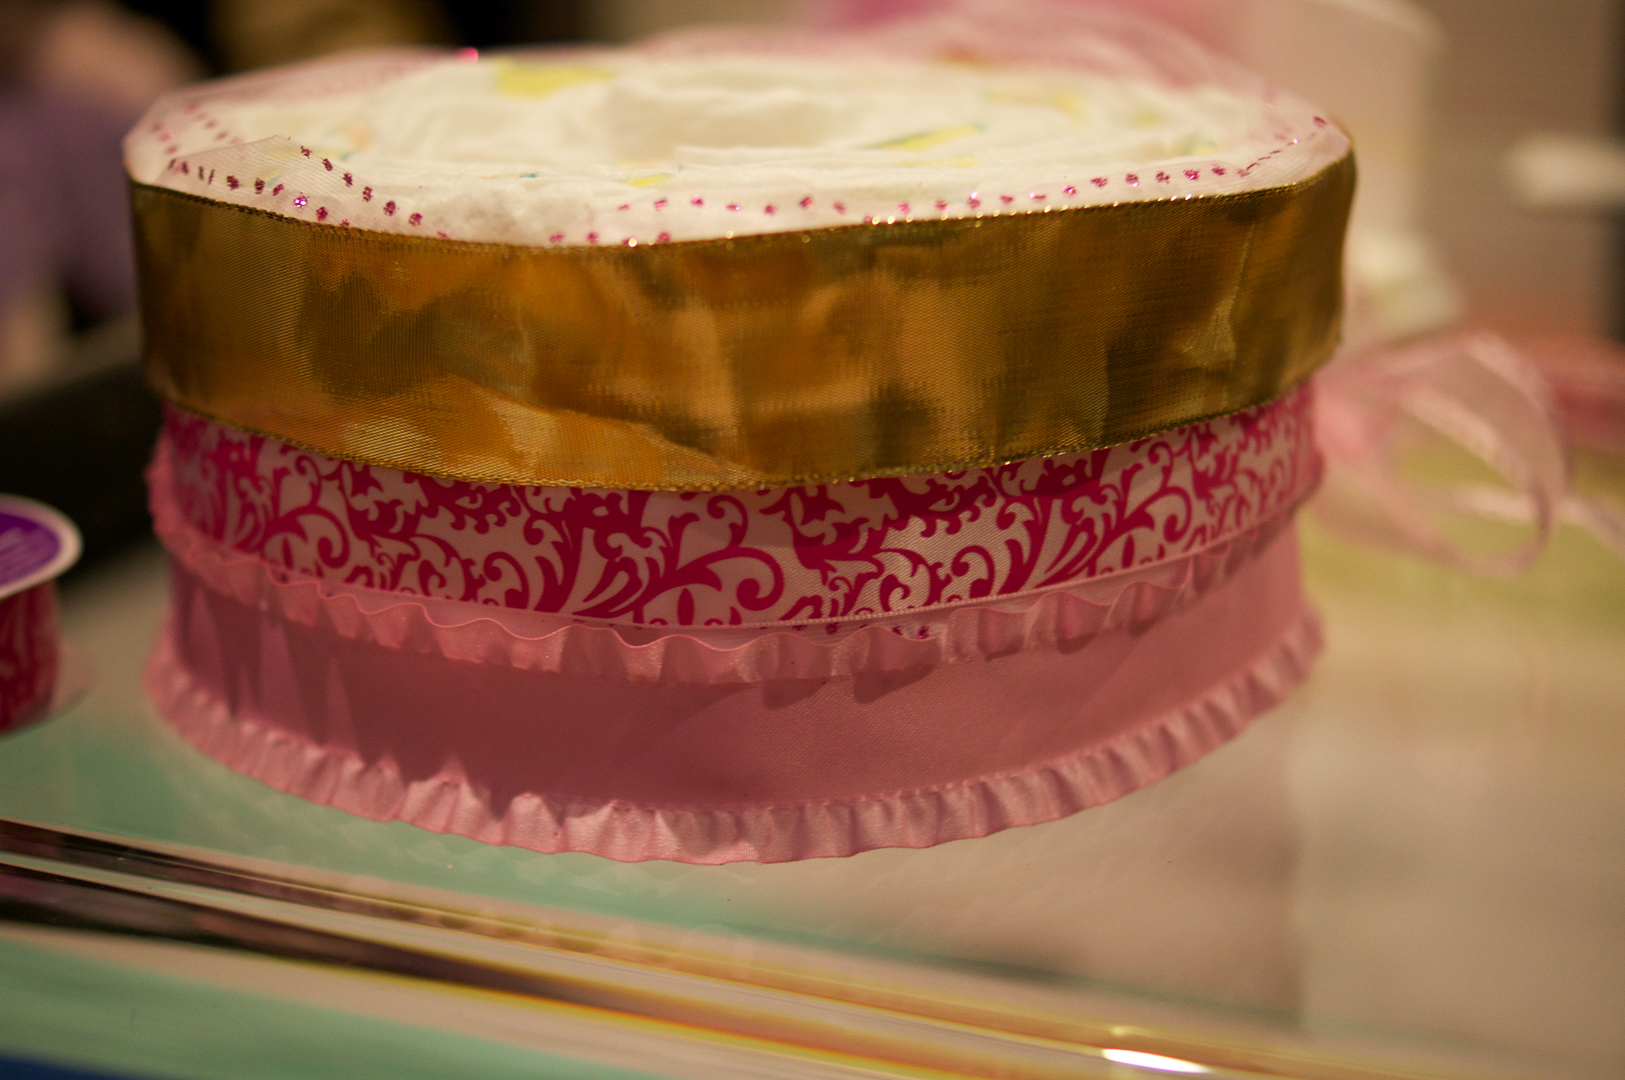
It's up to you how you want to decorate the cake with ribbons. I chose the pink double ruffled satin ribbon for the bottom, the pink satin damask for the middle, and a wide gold wired ribbon for the top. Designs are all up to you!
For the higher tiers, I make smaller cake bases (using a smaller pot for guidance). My cake base is 8 inches and my top layer is 6 inches.

I chose to put just one ribbon on the top layer and tied a golden ribbon around it as a bow. The pink fluffy balls decorate the top of the base layer.
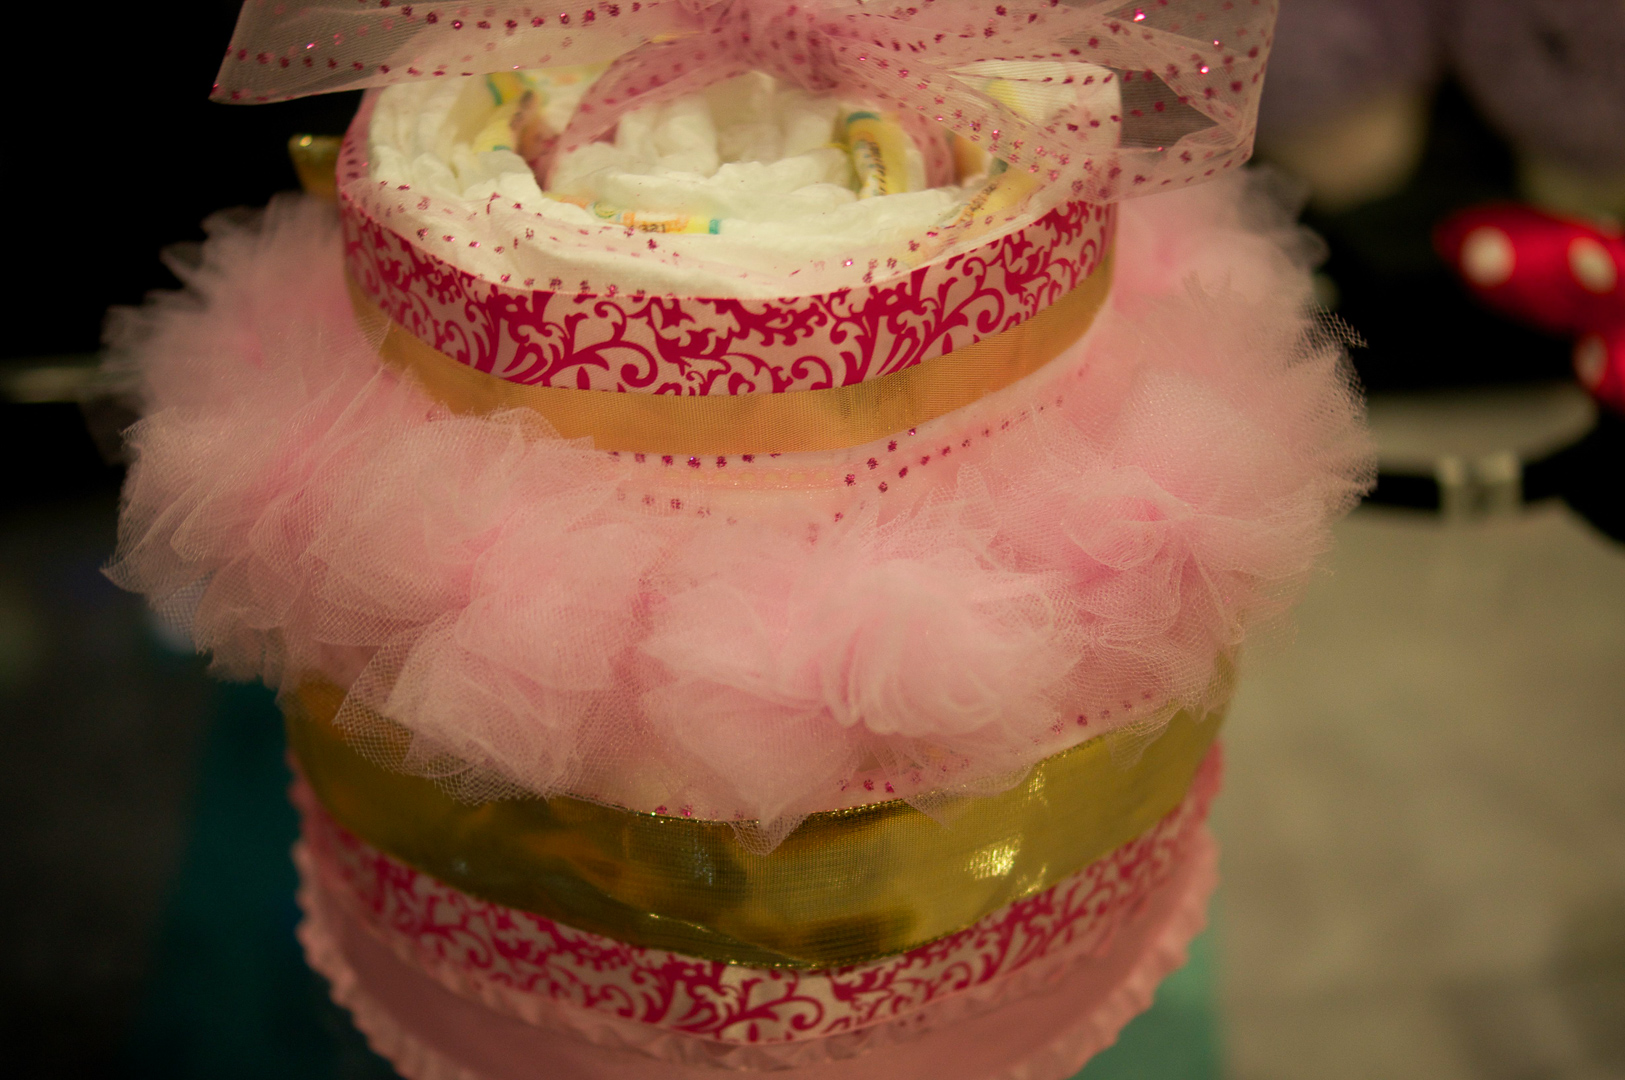
I topped the cake with a bow I made from extra mesh tulle.
Voila and there you have it, a pretty two-tiered diaper cake that would shine at any baby shower! In total, once I had all my materials ready, I made this cake in less than 30 minutes. Let your creative juices flow and see how you can decorate your diaper cakes. You can incorporate baby supplies such as baby bottles, brushes, pacifiers, hats and other things into the cake. You can also use fake flowers. See example below.

This is a four-tiered diaper cake that I made for my friend's baby shower. She used it again for her second baby shower.
Cost
One pack of diapers: $9.99 from Babies R' Us
Three rolls of ribbons: around $15.00 from Michael's
Mesh Tulle: around $5.00 from Michaels
Double-sided tape: around $4.00
Fluffy decoration: around $5.00
Other decorative materials: depends on how much you want to spend
Note: All images belong to this website and Kat Lieu and philandmama.com


Here’s my honest review of Baabuk urban runners